Installation and Setup
Prerequisites
To use the emteqPRO software you will need:
- The SuperVision app.
- The emteq SDK executable for either VR or Open-face configuration.
In order to record and monitor data, you will need to connect the mask to a computer running the Emteq Unity SDK. This can be either using the pre-made demos available on our downloads page, or by creating your own custom Unity app using the emteqVR Unity SDK plugin.
Installation Guide
You can obtain the zip file for SuperVision from the downloads page. You will need to extract and run the downloaded executable from the zip file to install the application. Release Notes are also available here.
The following guide applies to the emteqPRO system both in ‘VR mode’ (connected to an HTC VIVE Pro) and in ‘Open-Face mode’ (standalone, looking out at the real world!) sometimes referred to as ‘desktop’ as it runs as a normal app on your computer. Please select the appropriate version of the Emteq SDK demo from the download site and follow the instructions below.
When the installation is completed it should launch automatically. You can also launch it by clicking the desktop shortcut for the SuperVision application.
It is not required to keep the downloaded zip file, you may delete this file once the SuperVision app is successfully installed.
The SuperVision app will automatically check for new versions and run updates in the background. You will see a Windows notification whenever a new version becomes available.
Removing the Application
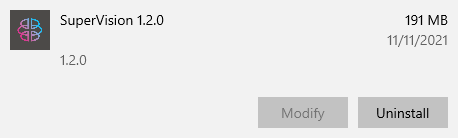
To uninstall the SuperVision app from your computer simply remove it as you would any other Windows 10 application via the control panel. Instructions can be found here.
Initial Setup and Configuration
Using the Emteq SDK
To stream data from the mask to the SuperVision application you must use the provided Emteq SDK.
There are two options to use Emteq SDK:
a) Download and run one of the compiled unity executables (see downloads page).
b) Download and develop a new Unity application using the emteq SDK (see the SDK the installation guide here.
Once the emteq SDK unity application is running, follow the steps in the next section Connecting the Emteq device to the SuperVision App to connect the emteqPRO Mask to the SuperVision.
Connecting the emteqPRO Mask and the SuperVision App
Once the Emteq SDK unity application is downloaded and running, follow the steps below to connect the emteqPRO Mask to the SuperVision application.
Please make sure that the mask is connected to the HTC VIVE Pro via the USB cable and that the HTC VIVE Pro is on and operating normally. If you are using the Open-face system, please ensure the USB cable is connected to the PC.
Open the SuperVision App on your computer
- Upon first open the app will show a login dialogue.

Opening the SuperVision app for the first time. - You can select to login as a ‘Guest' or login with your credentials, as Guest in this example.
- When logged in as Guest you will not be able to upload data insights, only monitor real-time sessions.
- You may also ‘signup', or use the forgot password utility, both will link to an external site in your browser of choice.
- Once logged in this is the initial screen you will see.
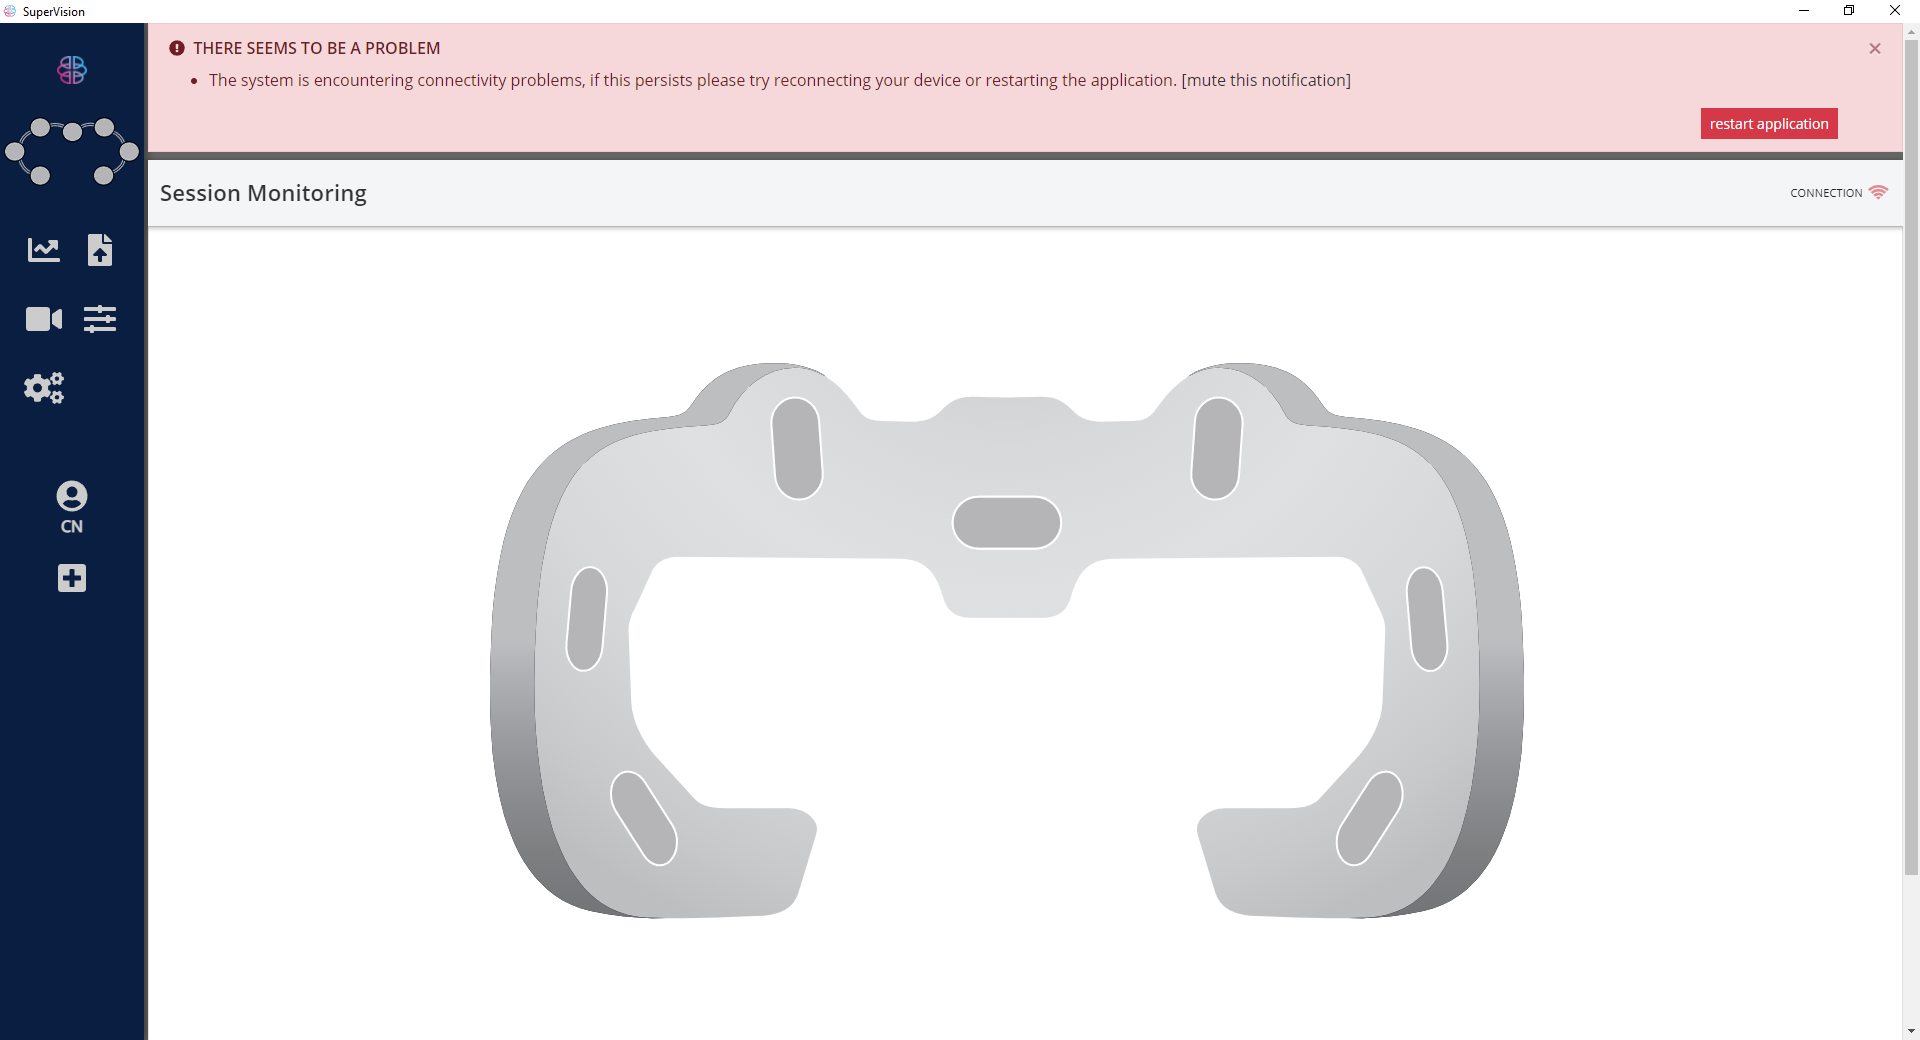
SuperVision app the post-login. - Note the warning message on the top of the screen and the red connection icon. This is because the mask is not yet connected. We need to connect the mask to the SuperVision app. Click the settings icon on the left of the SuperVision app as shown below, and follow the instructions in the next sections,
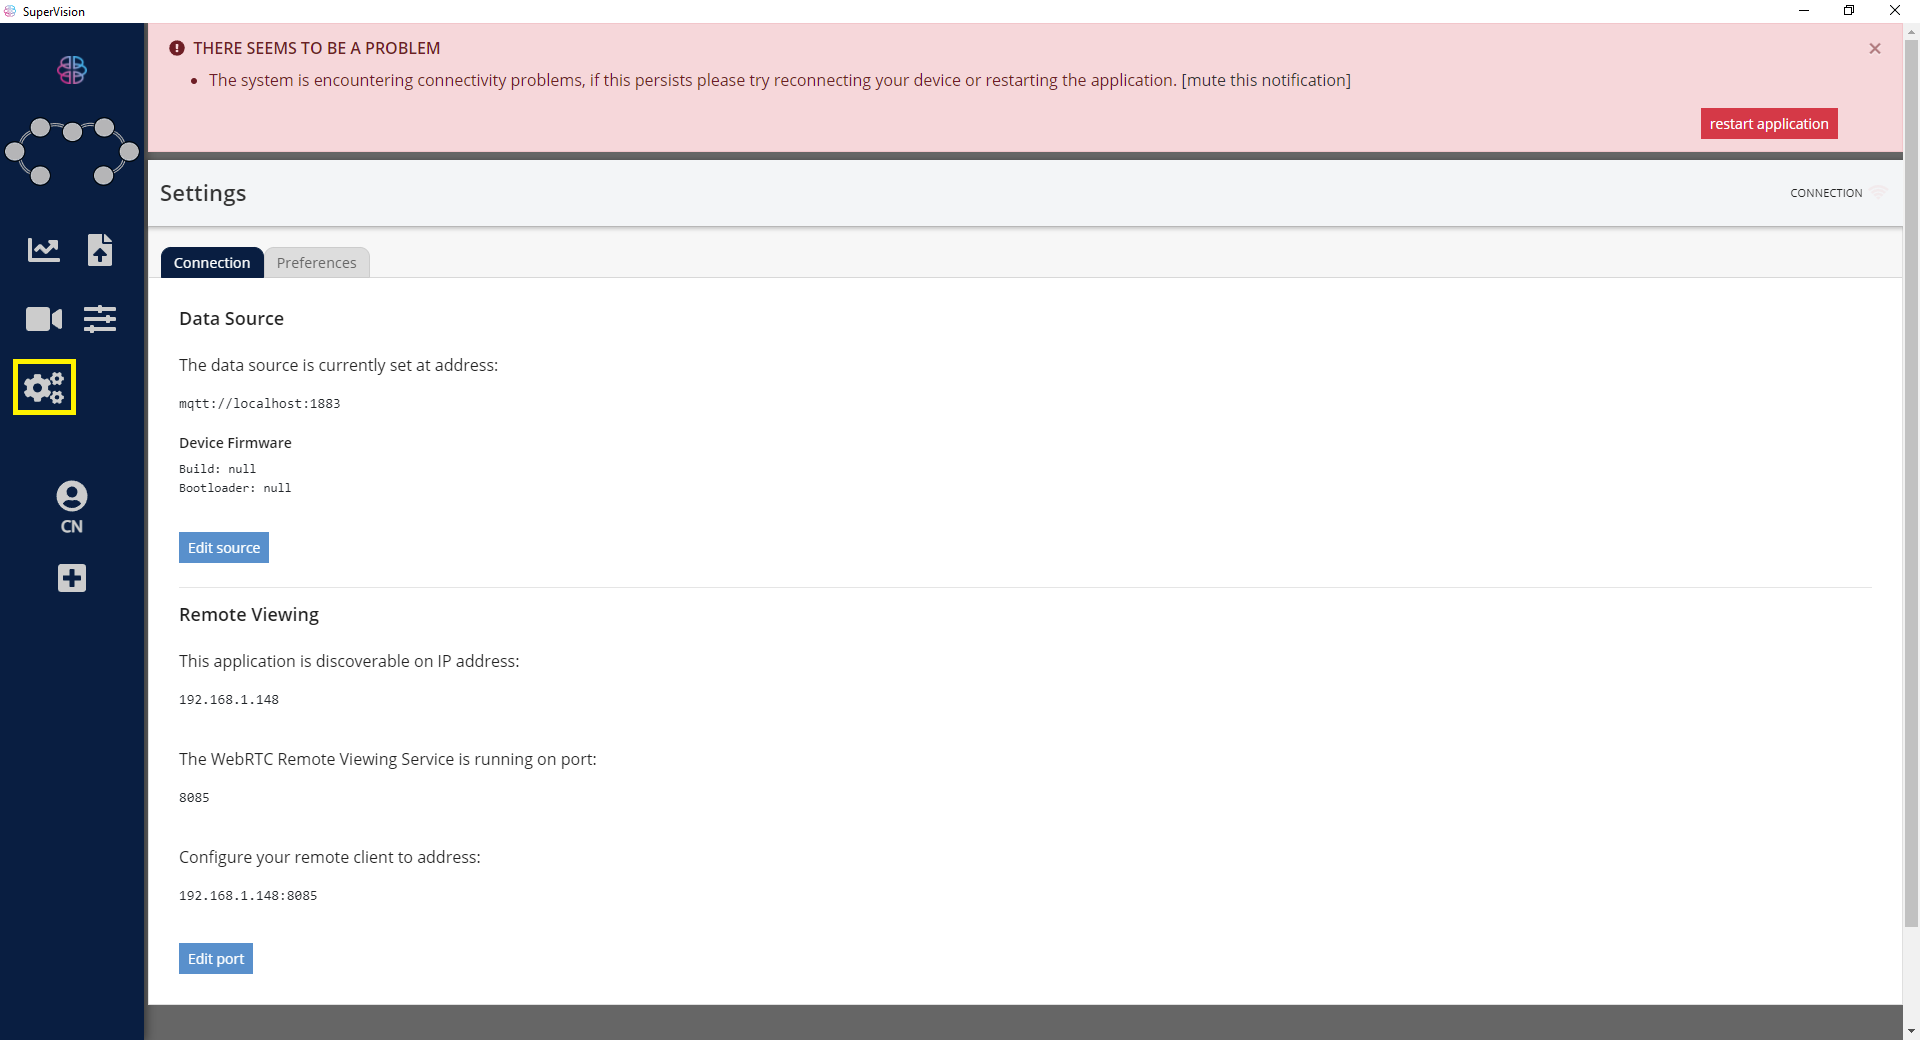
The SuperVision settings icon. - If no error message is shown, and the connection symbol on the top right of the app is blue, then the mask is successfully connected to the SuperVision. You can test the demo and look at the real-time signals in section Running the SDK Demo Scene.
Otherwise, please follow the steps below on how to connect the emteqPRO Mask to the SuperVision.
Connecting to the SuperVision App
Currently the SuperVision can be connected to a mask under the same local area network (LAN). Therefore, it is possible to run the application on a PC other than the one connected to the emteqPRO device and running VR experience.
Click Edit, as per below. 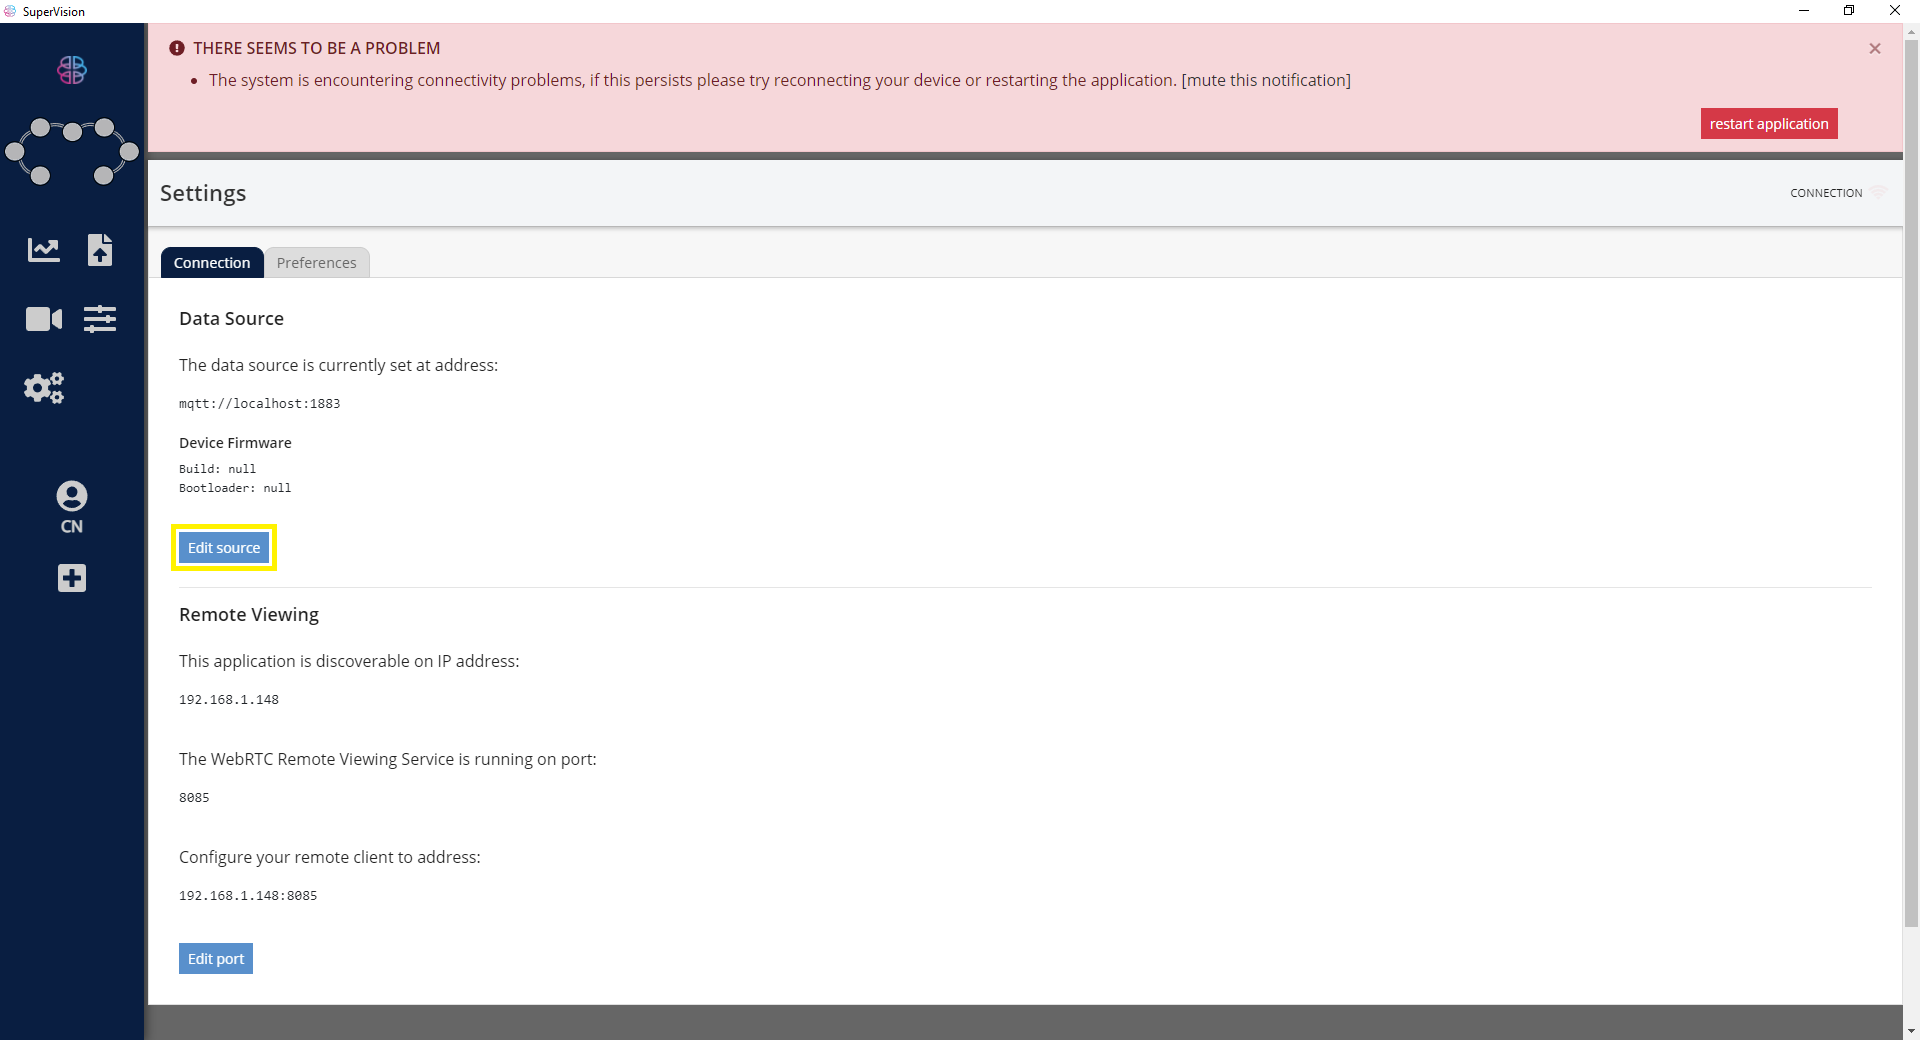
Running SuperVision on the same PC running the emteqPRO device
If you are connecting the SuperVision app to the emteqPRO Mask on the same PC you are currently using, you can simply use the IP address: 127.0.0.1 or type localhost into the SuperVision app. 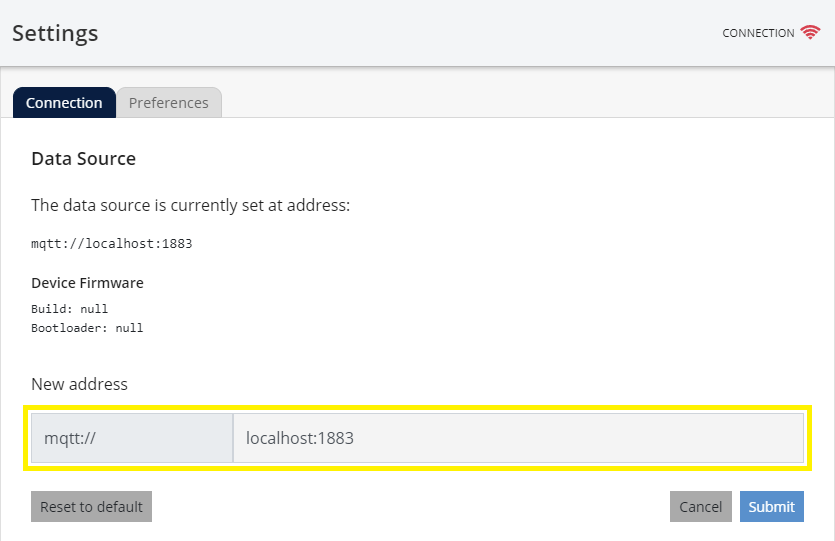
Connecting SuperVision via LAN (IP Address)
If you are running the SuperVision on a different Windows 10 PC or on a Pico Neo 3 Pro Eye HMD you will need to locate the IP address of the VR PC / Pico Neo 3 Pro Eye and enter it into the SuperVision app. To find the IP address follow the steps listed below for Windows 10 and Pico Neo 3 Pro. Once you have the correct IP address simply enter it into the SuperVision app as shown below.
Type the IP address into the SuperVision app. You can optionally enter the port here too. 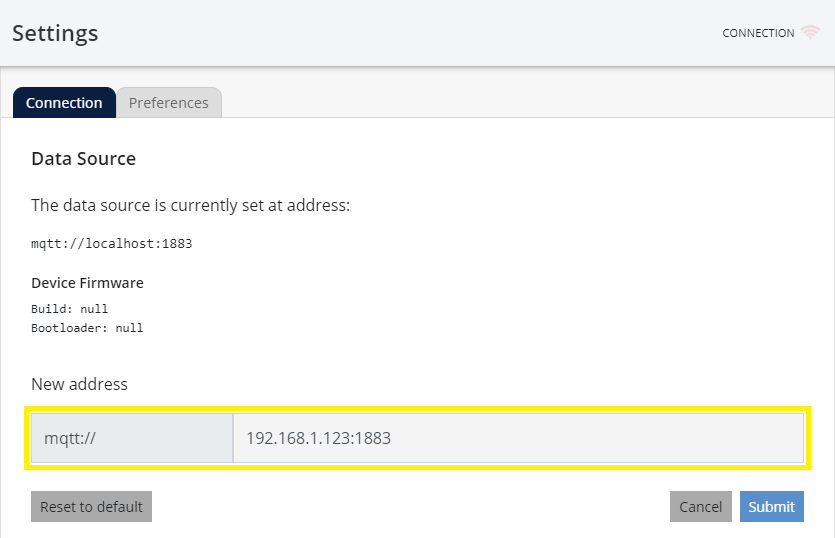
If you do not enter a port number along with the IP (in the above example 127.0.0.1:1883) the SuperVision app will use the default value of 1883.
Running the SDK Demo Scene
- Open and run the sample unity scene (Go to Downloads) for the relevant software. or a unity executable that contains the emteqSDK. See below for screen shot of the sample unity scene.
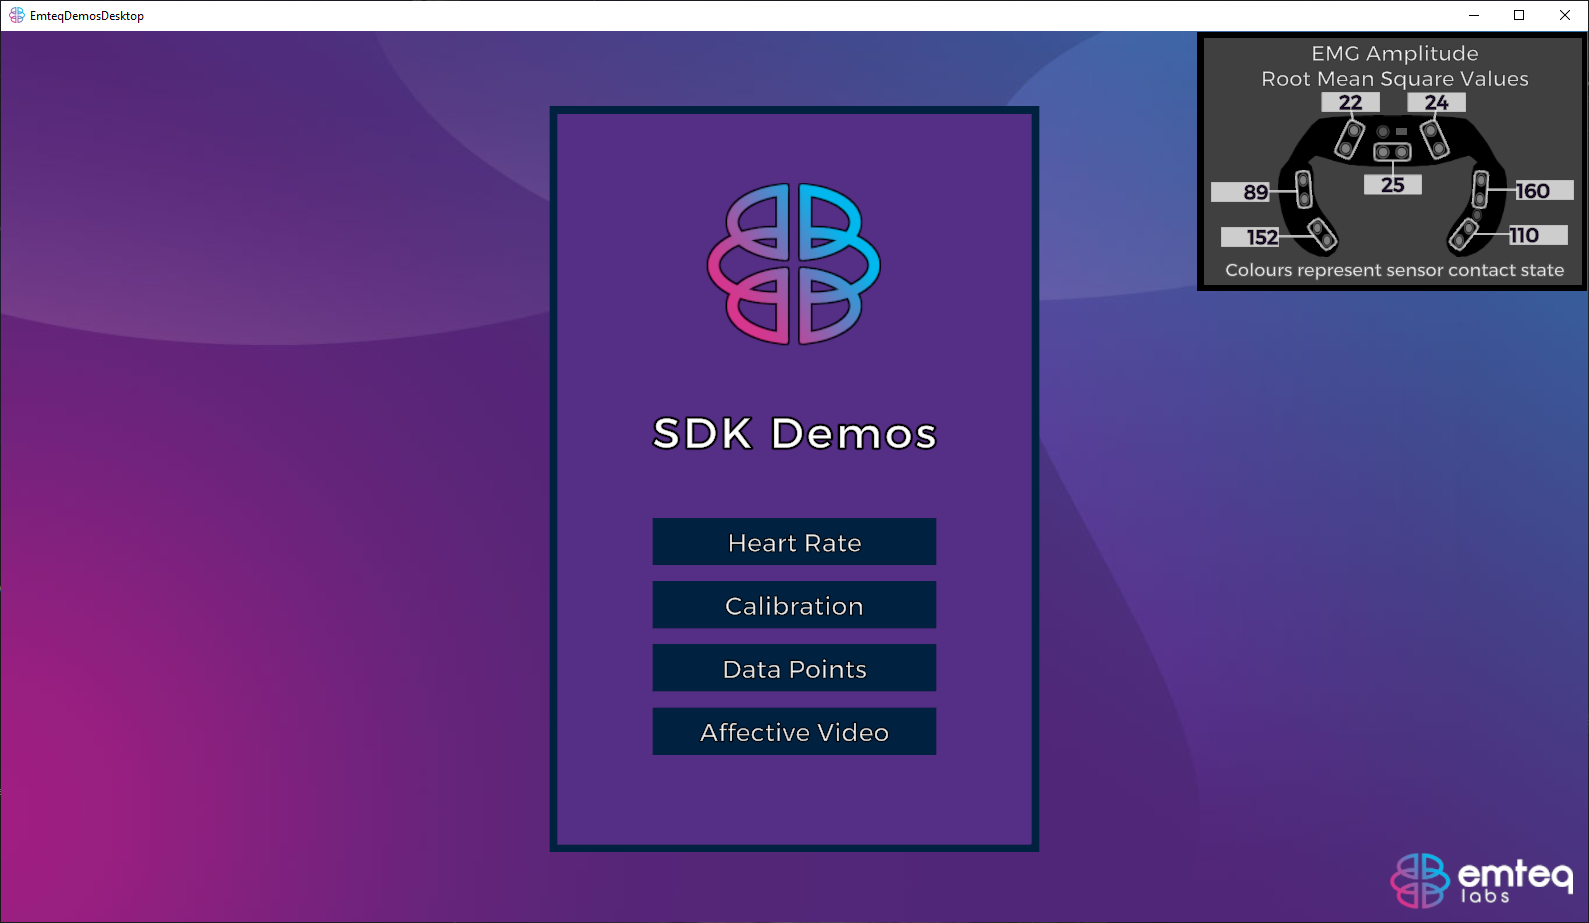
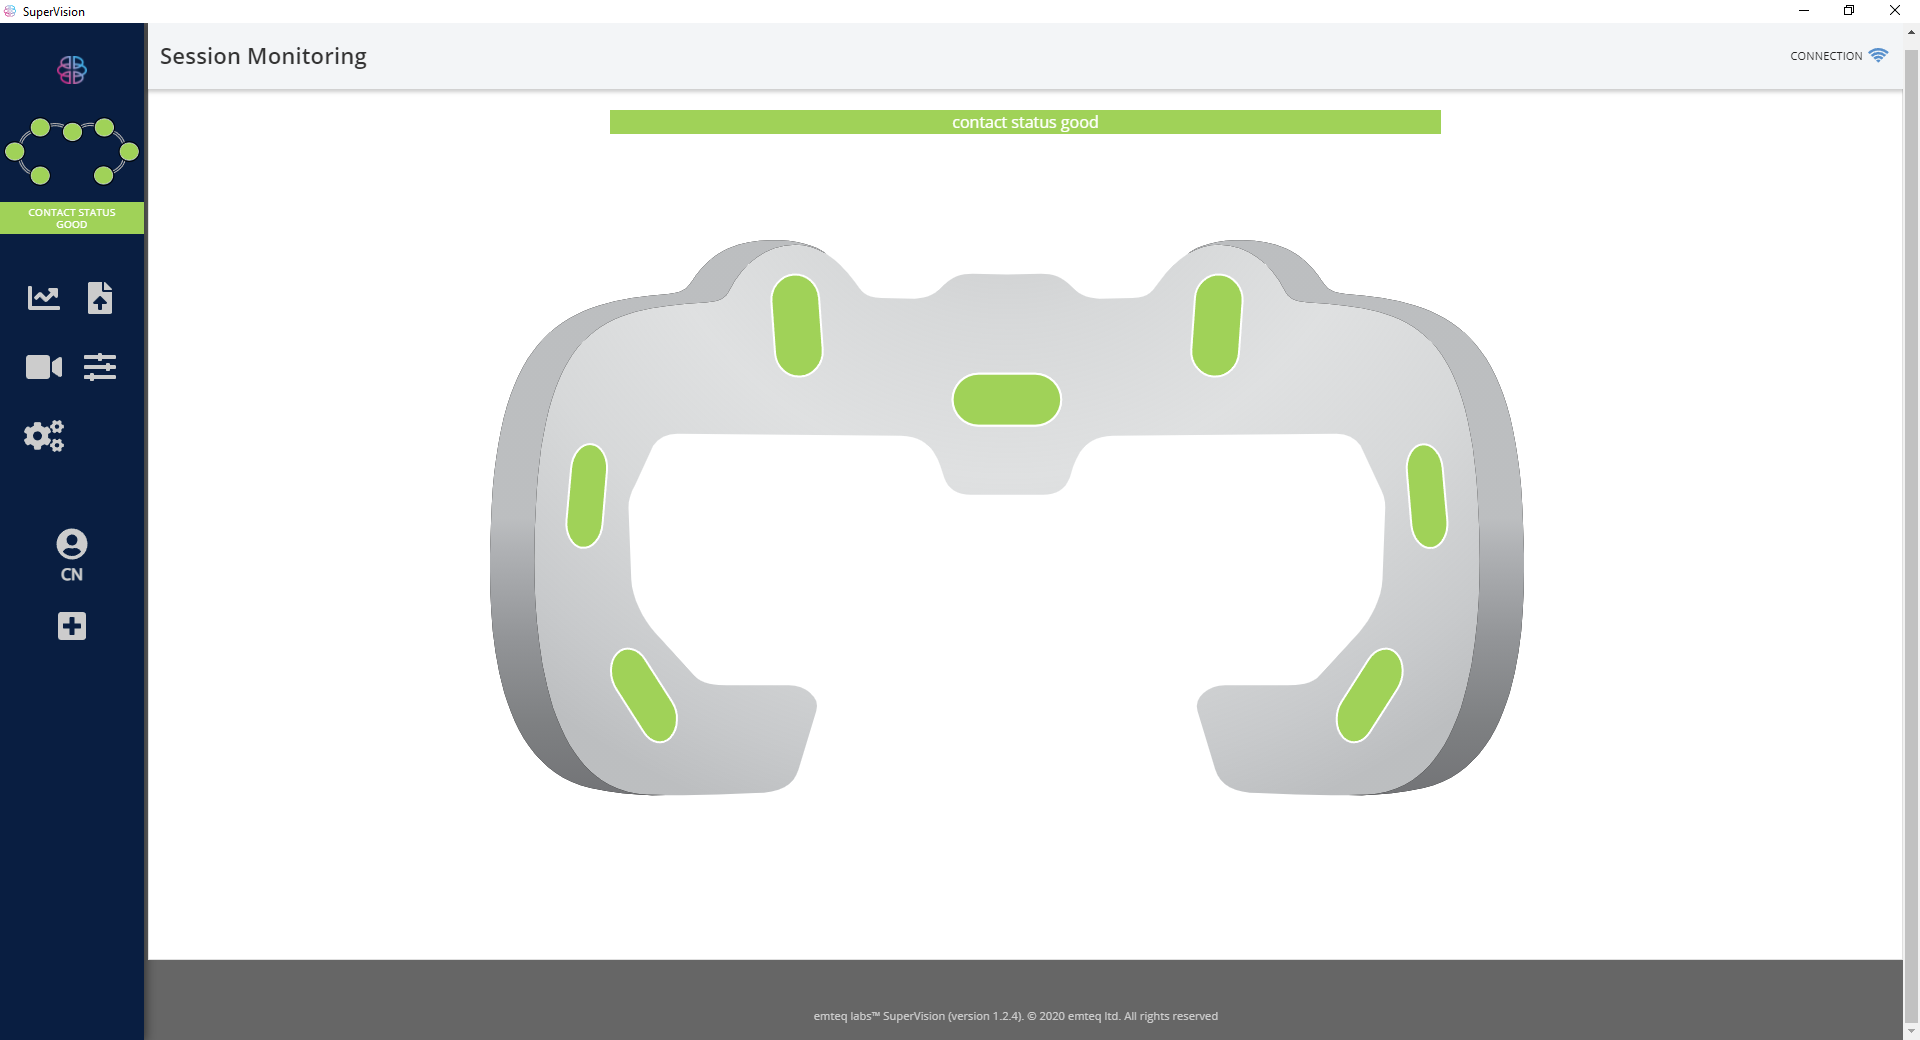
- Once the SDK is running and mask is connected to the SuperVision, the connection icon on the upper right will show full (light blue), see image below. This indicates the SuperVision app is receiving data from the mask.
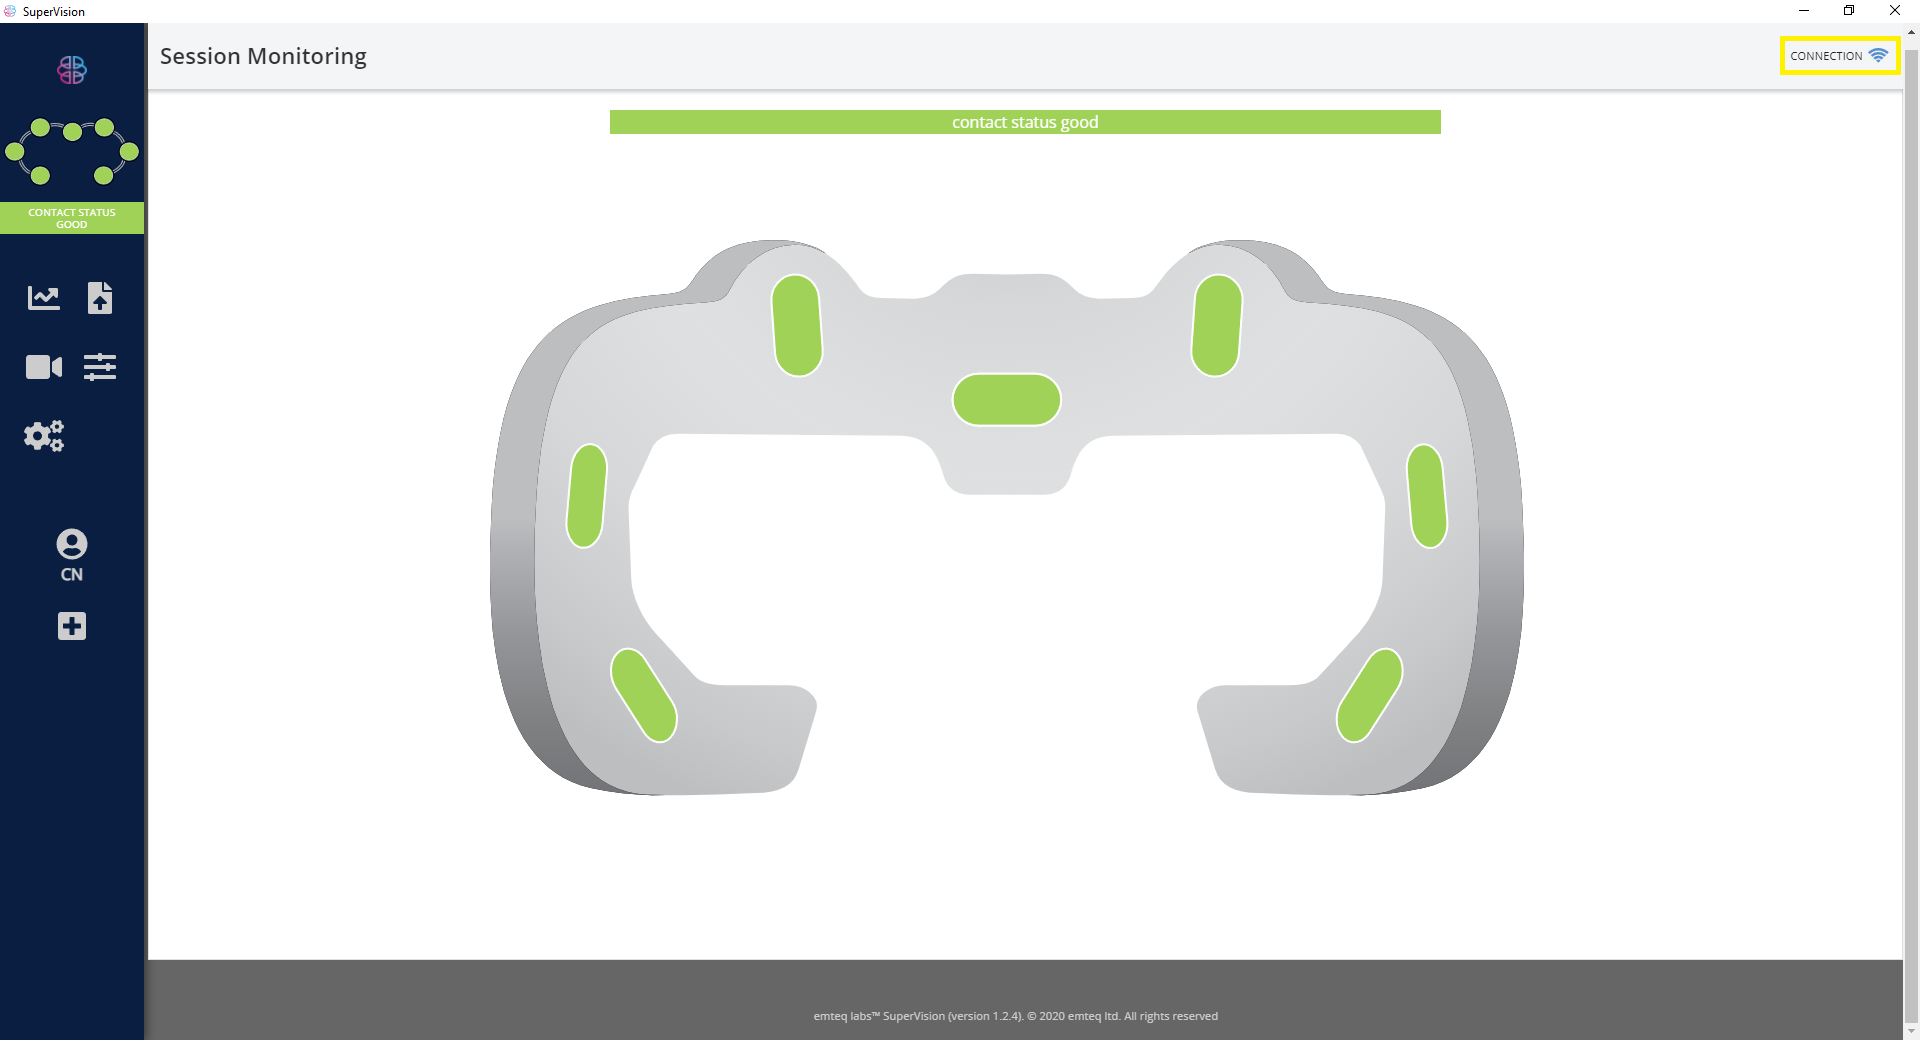
- Next, the sensors will change from orange to green when in contact with the skin, explained in section Ensuring good signal. The connection icon should now show as blue. If that does not happen, please double-check the IP address and ensure the USB cable connecting the emteqPRO Mask to the VR headset and from the VR headset to the computer are securely connected. If the issue persists, please see section ‘Customer support'.
To collect data using the system, you can simply use the emteqSDK scene provided (the data are automatically saved) or use the Unity SDK to trigger data recording. For more information see EmteqVR Unity SDK.
Using the EmteqSDK Unity demo scene
The Emteq Unity demo scene allows you to try some of the demos and start data recordings with the emteqPRO system. The main menu is shown below.
All demos and functionalities are explained in EmteqVR Unity SDK.
In this section, we will show the Calibration example. By clicking on the Calibration button, a new view will appear and data will start recording. This section is available in the VR Demo under Affective Videos which contains a calibration section before 2 videos chosen to evoke different emotional responses.
- A mask will appear each time the sensor contact is not optimal.
- On the upper right corner, you will see a simplified mask interface, similar to the one seen in the SuperVision App. Sensors that are not touching will show as grey, any sensors struggling to maintain contact will be blue. When all sensors are connected and touching the skin the they will be shown as solid green.
- If the sensors are connected but you are struggling to achieve good sensor contact refer to section Ensuring good signal. If the sensors are not connected, follow the steps in section Getting started with emteqPRO. Once all sensors have good contact you are ready to begin the calibration.
emteqPRO Unity demo SDK, showing the calibration scene when not all sensors are touching the skin. An alert will tell you to adjust the headset until all sensors are green and then you can begin. 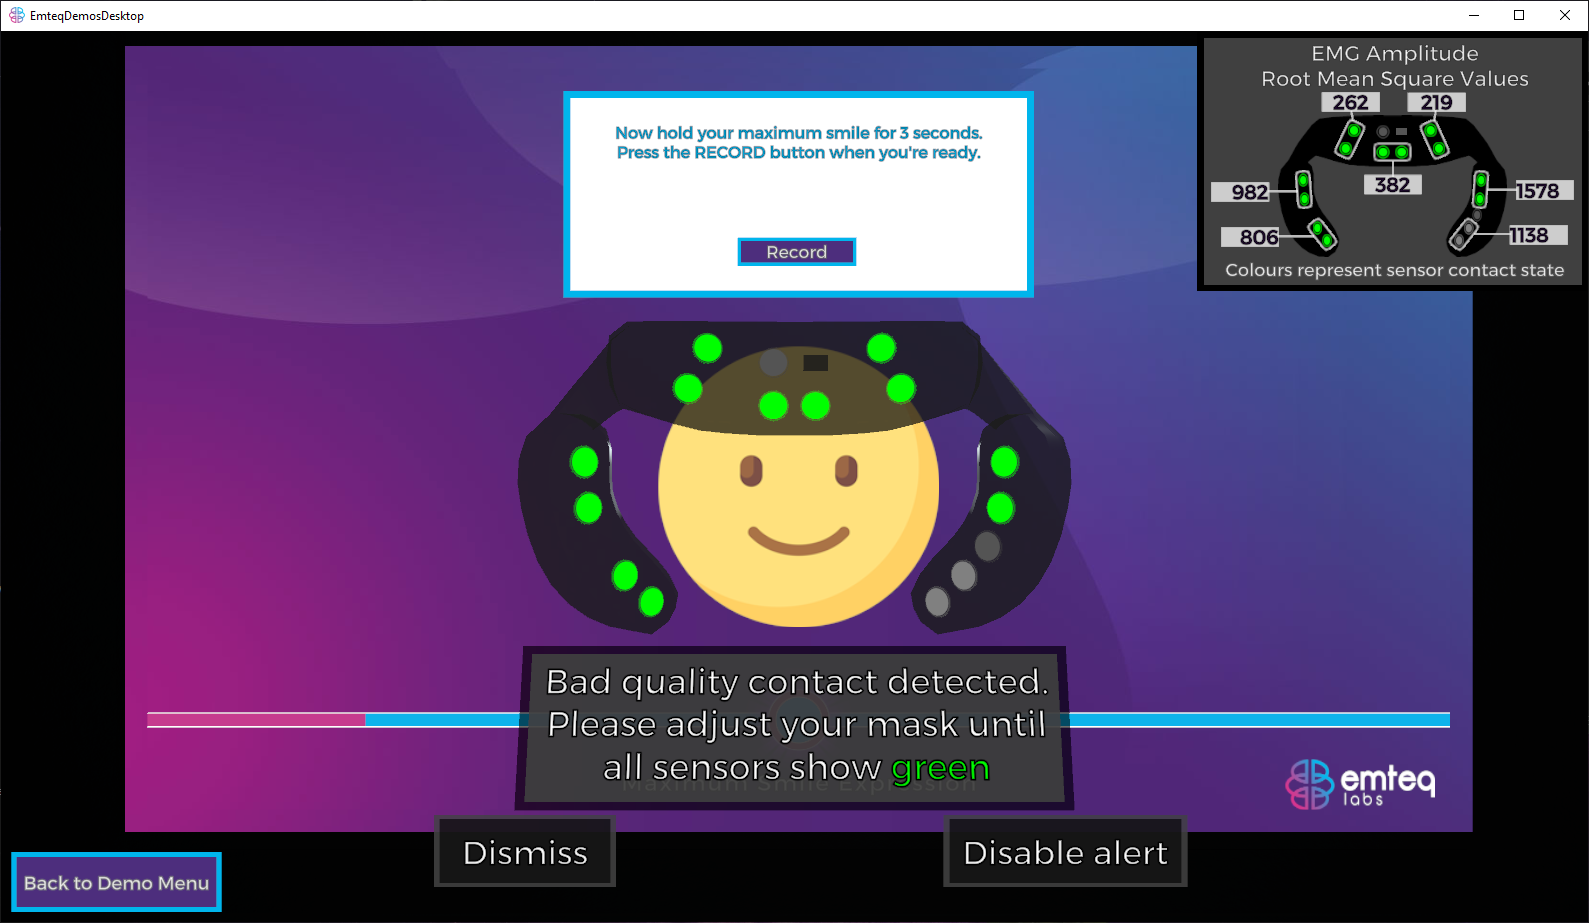
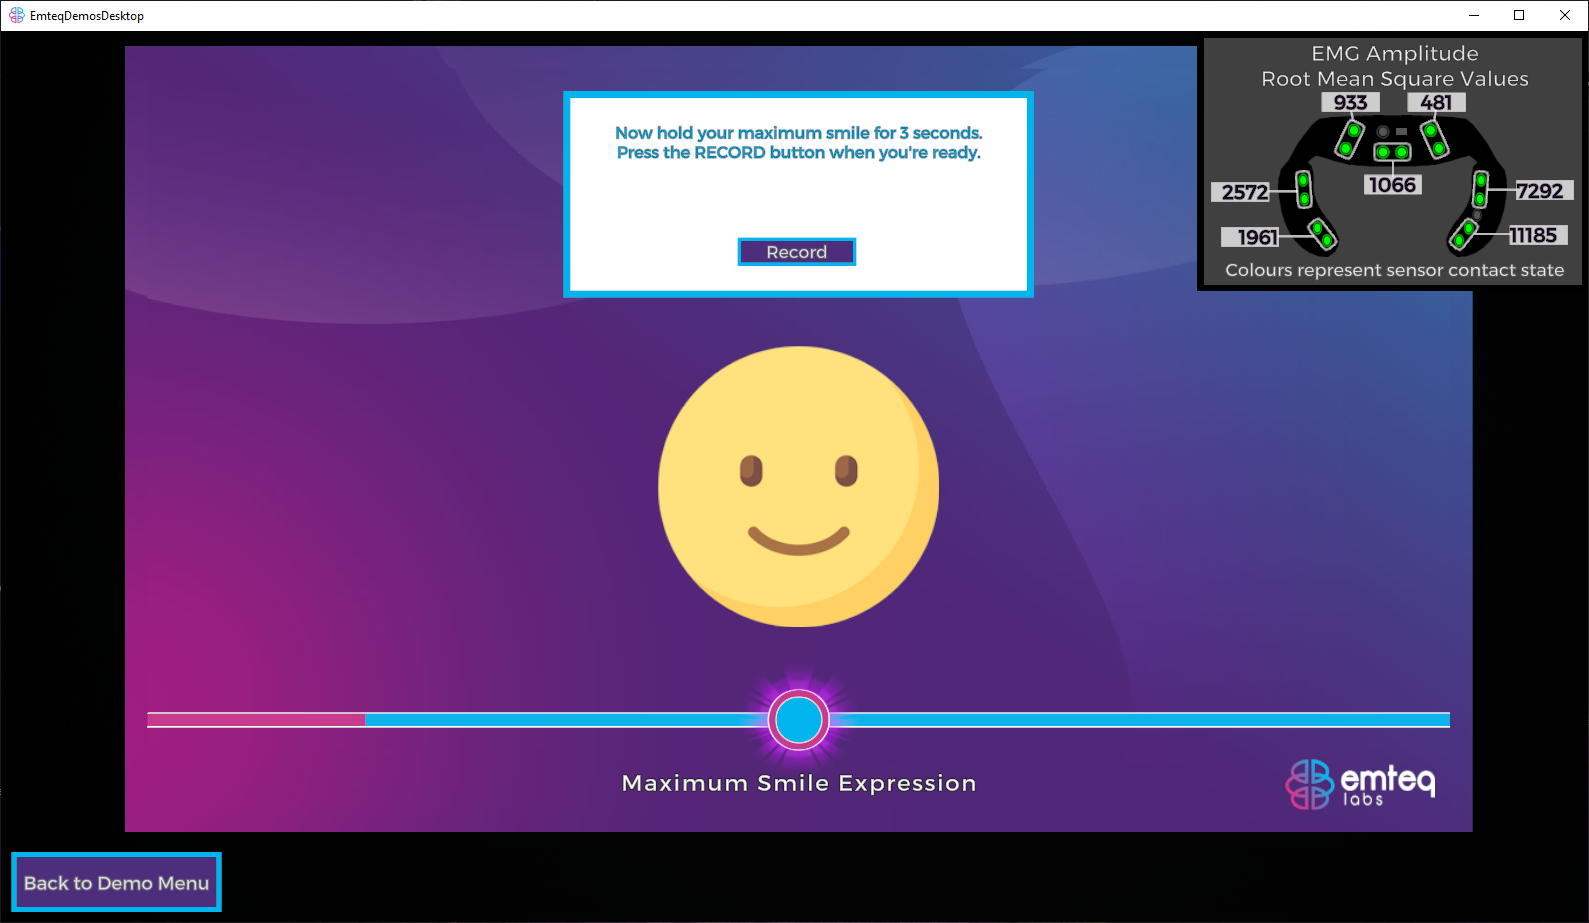
Once all sensors are touching the skin you are ready to begin recording the calibration. The top right corner shows a diagram of the emteqPRO Mask which allows you to monitor the EMG signals throughout the calibration scene. - Follow the on-screen instructions to carry out the expression calibration.
- Exit the demo.
- The outputted data files will be saved locally, in the Documents folder on your PC, for example: (\Documents\EmteqLabs\[Application Name]\Upload).
For more information on the data format, see section Understanding the data.
