Open Face App
Introduction
The Open Face App is intended for use when you have not yet integrated the emteq SDK with your own experience. Designed to be light-weight supplementary app that is run alongside other applications and experiences without the need for up front development. Fully customisable annotations and integrated calibration provide full coverage for data collection, but requiring manual triggering during data recording that the full SDK integration provides automatically for users.
It can be used for rapidly prototyping a data collection series, allowing for proof-of-concept and testing of your collection methods early in development without writing any code. This helps mitigate issues and can help identify additional requirements ahead of time spent on any data collection you are working on.
You can find this app on our downloads page.
Follow our guide on Best Practice for Data Collection.
Usage
When you run the app it will not automatically start recording data as our other Demo applications do. This is because you will need to setup any annotations you require ahead of any data recording. You will also need to begin data recording in order to be able to complete calibration, however you can connect to SuperVision without a recording running to confirm all checks on Mask Fit.
Mask connectivity will be shown at all times in the top right corner, showing fit state for all sensors along with current values. If this shows grey icons and 0 in all locations then no mask is detected connected to this system.
The app will run if minimised, but will stop recording if closed. It can be used (interacted with) while the user has a VR application running in the foreground without any issues for the user in VR.
The buttons on the left are used to control the main portions of the recording session. With buttons to [Start Data Recording], [Stop Data Recording] and [Start Calibration]. These will be inactive depending on the current state of the app.
Calibration
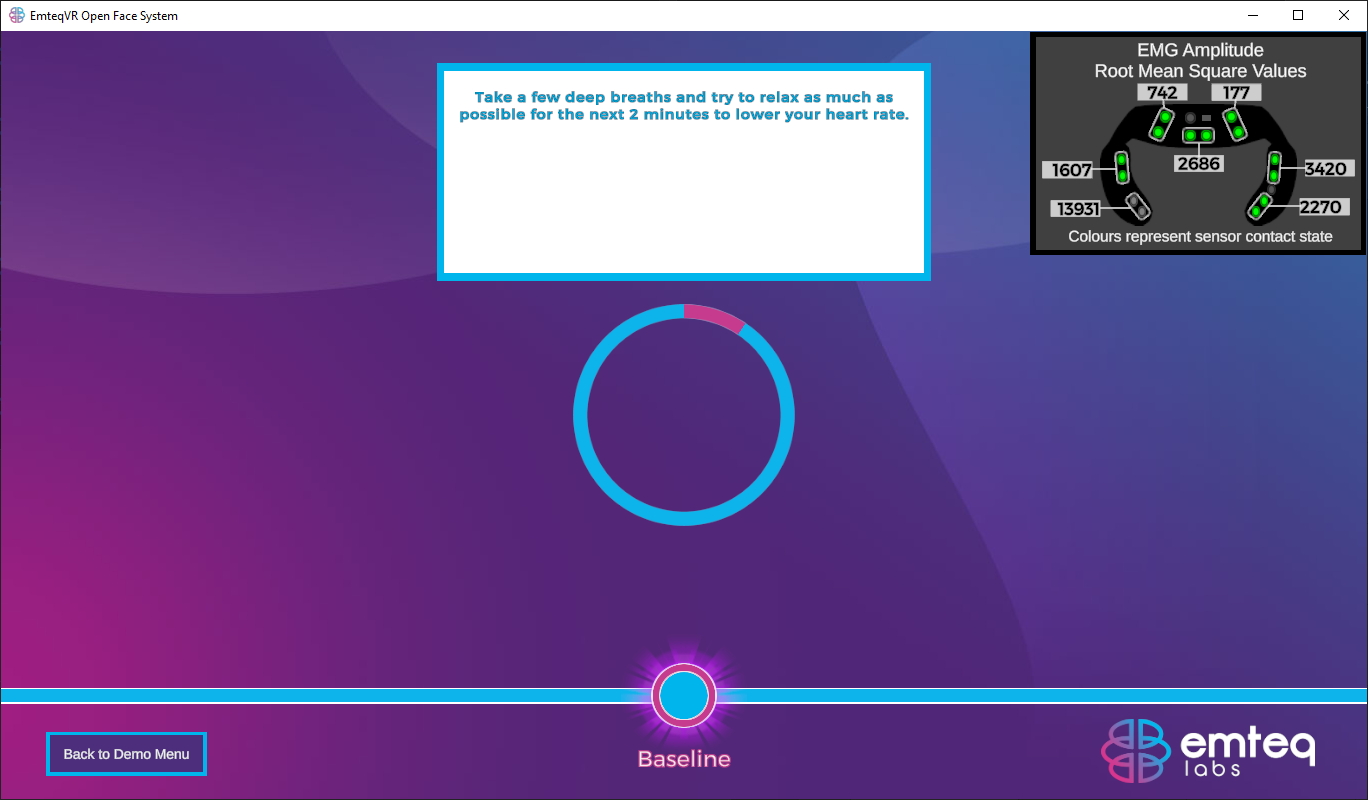
To run a calibration click the [Start Calibration] button. This will take you to the calibration wizard a relaxation portion to establish baseline for Heart Rate along with a guide for facial expressions required to calibrate for the user. You can move back at any time, if you need to restart a calibration session simply go back and re-enter to begin again.
Firstly a 2 minute long relaxation portion will begin, with the timer being denoted by a wheel.
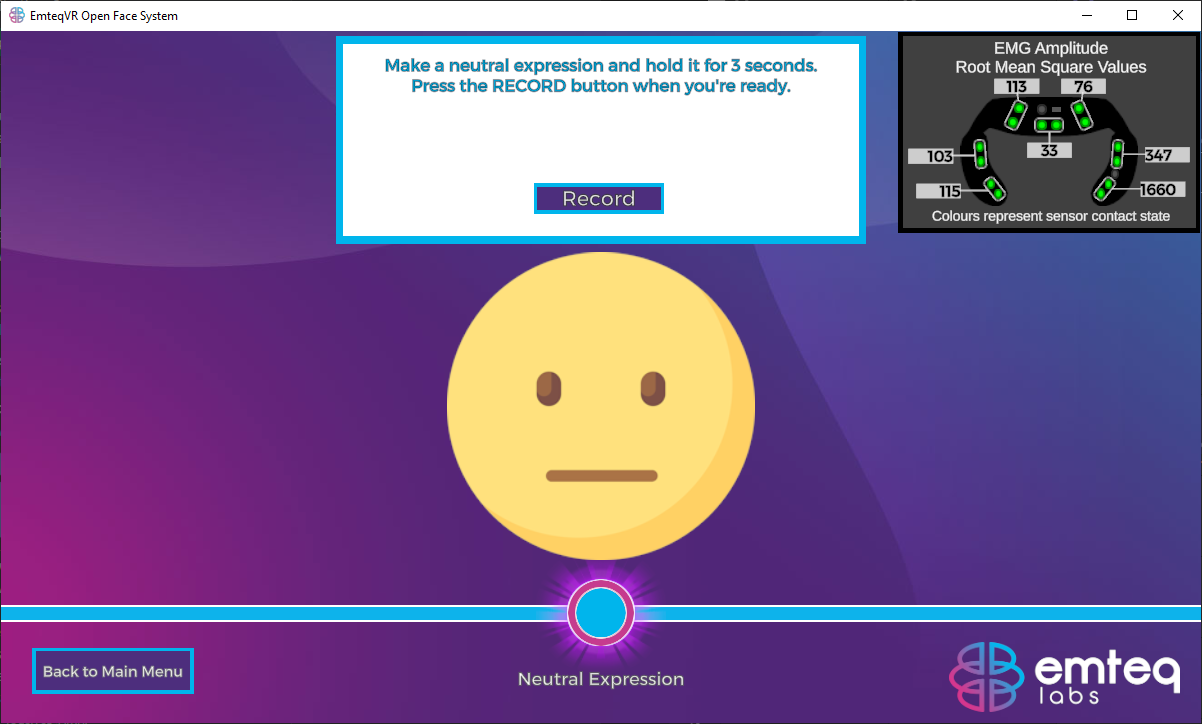
Once completed the facial expression steps for calibration are as follows:
- Neutral - 3 seconds.
- Smile - 3 seconds.
- Neutral - 3 seconds.
- Frown (with brow) - 3 seconds.
- Neutral - 3 seconds.
- Eye Brow Raise - 3 seconds.
Follow our calibration guide for best practice on running emteqPRO mask calibration.
Annotations
Annotations are used to mark events within your data so that analysis can be performed. Each calibration step uses event annotations as does various mask fit events that trigger if the contact level with the skin alters during the recording.
To add a new event, simply click ‘+ Add New Event' at the top of the screen at any time.

We recommend setting up the required events as soon as you open the app and before you intend to begin data recording. There is no need to close the app between recording sessions, simply stop the data recording at the end of each session.
There are two types of event annotation you can add. You can select these options from the ‘Event Type' dropdown.
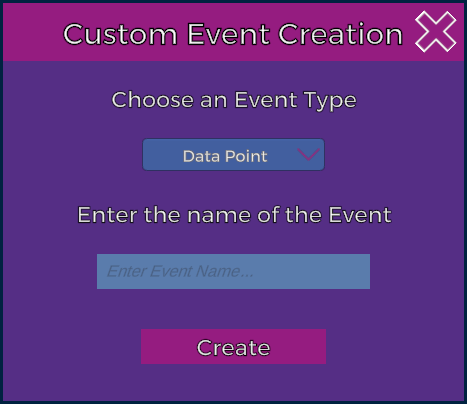
Data Point
The first being a single event annotation or ‘data point'. This will have a time stamp associated with it, and the text string you assign and will represent a single one of event. The second type is ‘data section', which has the same parameters as a ‘data point' except it has a start and end annotation.
Data Section
The second type is ‘data section', which has the same parameters as a ‘data point' except it has a start and end annotation. For example, during calibration the user performs certain facial expressions for 3 seconds. So a ‘data section' would have two events for the start of the smile and another event 3 seconds later with the smile end event.
Triggering Event Annotations
Once you list is created it will look something like this, though likely with more annotation in the list. A scroll bar will appear depending on the screen size and list length.
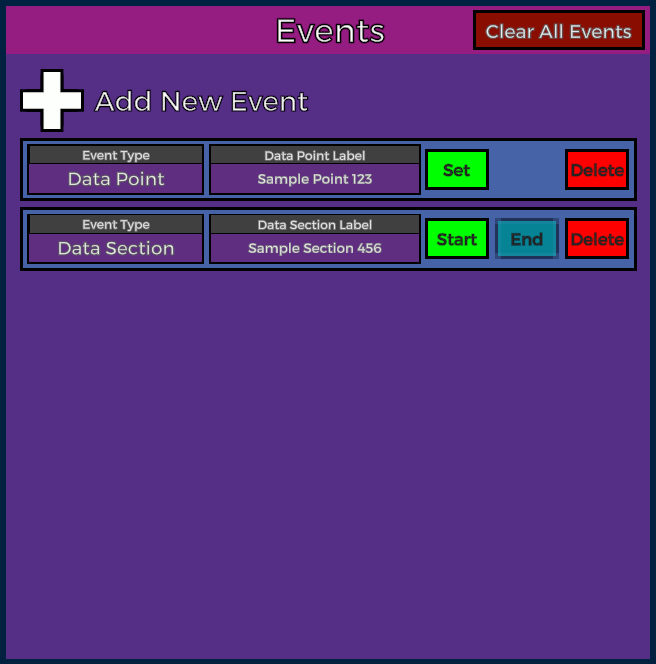
You can then activate any annotation at any time during a recording using the [Set], [Start] and [End] buttons for each annotation. These event markers will be visible as events with the SuperVision app.
You can delete an individual event annotation at any time, or clear them all using the controls for each. You will be presented with a confirmation dialog before they are removed.
Eye Tracking
This app now features tobii eye tracking support, whilst used in conjuntion with the HTC VIVE Pro Eye. Offering a sub-set of the capabilities compared to full SDK integration.
This requires the user be wearing the HTC VIVE Pro Eye for this to function. The eye tracking portion is recording from the HMD and not the emteqPRO mask.
Usage
Assuming you have already installed and calibrated the Eye Tracking functionality within the HTC VIVE Pro eye this is a simple process.

Clicking the [Start Eye Data Saving] button will trigger the tobii service to run. If it is not already running it will start and run in the background, visible as a robot icon in the system tray within Windows. This may take a moment to start up, the button will update once the recording has actually started.
The colour of the robots eyes denote the current status of recording, red being not recording and in standby and green showing that active eye tracking and data recording is taking place. The first time you open the tobii app it may create a Windows User Account Control prompt requesting permission for the app to run. If you are within VR you will not see this as it is only displayed on the monitor, but you will here the tone that plays when it opens.
The button will update to show [Stop Eye Data Saving] now that it is running. and will record for the duration until you chose to stop or close the app entirely.
Once done it will save the .eyedata to the default location C:\Users\$USER\AppData\LocalLow\EmteqLabs\[Application Name] as described here alongside the unnity log files.
